
E.3 REMOVING FILLINGS
When looking at the walls in the Punta Begoña Galleries, one of the most noticeable features is the graffiti covering them. Not all the defacements we have found have been applied using the same techniques or the same materials. This means we have used different ways of removing them.
The fillings involve the deterioration of ceramic pieces with inks mixed with fillers that make them denser. In these cases, the inks have an added component (filler of white pigment) that turns them into a thick paste that completely covers the tiles, as if applied with a roller.
The stages involved for removing these products and restoring the tiles are as follows:
- Stage 1: inspection of the area to be treated.
- Stage 2: start of work by applying a specific paint stripper for removing fillings.
- Stage 3: gentle rubbing to blend the stripper into the filling to be removed.
- Stage 4: removal of the stripper gel and the filling.
- Stage 5: finish by applying pure acetone to fully remove all the fillings.
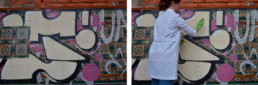
Process of removing fillings: stage 1 inspection of the area to be treated in the north-west gallery (left) and stage 2 application of the chosen stripper (right), 2017. Source: Project for showcasing the Punta Begoña Galleries
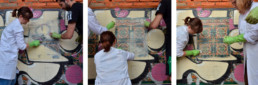
Process of removing fillings: stage 3 rubbing the surface with embedded paint (left), stage 4 removal of graffiti inks (centre) and stage 5 completing the finish through the application of acetone (right), 2017. Source: Project for showcasing the Punta Begoña Galleries
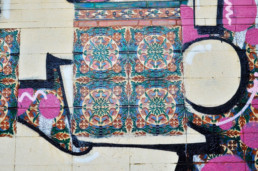
Photo of the end result in the treated area, 2017. Source: Project for showcasing the Punta Begoña Galleries